Web designers often need to make a panel comprising multiple images. All images need to fit into the same grid, the size of which is specified in the HTML code on the webpage.
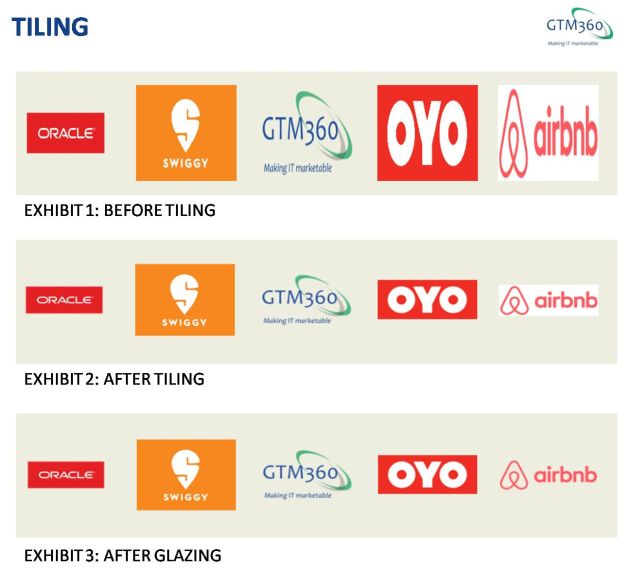
If we take a customer logo panel as an example, the images are bound to have different aspect ratios (i.e. ratio of width and height). Therefore, if they’re inserted in their original form on the website, the logos will appear distorted, as shown in Exhibit 1 below.

You can view this webpage at https://www.sketharaman.com/tiling/tiling.htm.
I first discussed this problem in my blog post titled Preserve Aspect Ratios & Protect Corporate Identities! At the time, I alluded to a technique that I called tiling that’s used to process the images to make the distortion problem go away, and pointed to some third party websites that had implemented it.
I recently had a first hand opportunity to use this technique and thought I will describe the procedure in case it’s useful for others.
Enter Tiling for Normies.
TILING FOR NORMIES
Tiling is a technique where you create a frame / placeholder (“tile”) of the allowed size and fit all logos into it, while preserving their native aspect ratios. Given below is a step-by-step guide for carrying out tiling and the associated process of what I call glazing. (As a n00b, I’ve used a eclectic mix of tools to execute these steps. Professional graphics designers might be able to get them all done in a single software like Adobe Illustrator or Figma.)
Powerpoint:
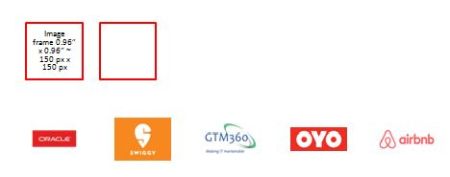
Open new slide > Insert > new square Shape (“frame”) > Click the shape to select it > Right click > Size and Position > Set the width and height such that the shape matches the allowed size (say 150 pixels width x 150 pixels height). After some trial-and-error, we found the dimensions of the square to be 0.96″ width x 0.96″ height.
Copy-paste the original logo image file (e.g. logo-oracle.png) into this slide. Click the image to select it > Right click > Size and Position > Check Lock aspect ratio > Change the longer side of the image to 0.96″. Depending on their aspect ratio, the longer side will be width for some images and height for others.
Click the frame to select it > press Shift + click to select the logo image > Align Middle > Align Center.
Right click the frame > Format Picture > Line color > check No line.
Click the frame to select it > press Shift + click to select the logo image > Right click > Group.
Right click > Save as image, select the default PNG file format, save the file (e.g. logo-oracle-150w-150h.png) in some handy folder on your PC / laptop.
This is how your working slide might look.
IrfanView:
Open this file. Check if its size is 150w x 150h. If it’s not, go to
Upload the above image > Resize it to 150 x 150 pixels > Download the resized image to your local PC / laptop.
Now you have the logo in the required size, with its original aspect ratio preserved.
Repeat the above steps for all the logos.
Now you have all the logos in the same size and their original aspect ratios.
Frontpage:
Insert all the above images into the webpage and publish it to the website. You should see the following panel (Exhibit 3).

As you can see, the distortion has gone away, and all the logos look perfect.
Hmmm, that AirBnB logo looks odd, doesn’t it?
Yes.
The above procedure reproduces the background of the original image. If you download the logos as PNG files, they should be free of background. But some logos might still have it, like the AirBnB logo. Its white background looks jarring against the gray background of the website.
To make the background disappear, follow these steps (“glazing”):
ColorDetector:
This is a nifty Windows software that extracts the RGB / HEX values of colors. I’ve been using this tool for over a decade.
Open ColorDetector > Find out the exact RGB or HEX value of the website’s background color.
In our website, it’s RGB (238,238,224) or HEX (#EEEEE0). (Maybe I did something wrong but this was different from the RGB (- 238,238,238) and HEX (#EEEEEE) values that I got from the browser’s inspect element command).
Powerpoint:
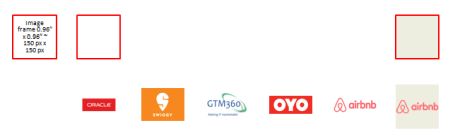
Click the frame to select it > Press Ctrl + D to create a copy > Right click > Format Picture > Fill > Solid Fill > enter the RGB / HEX values you got from ColorDetector in the earlier step. Now the frame will be filled with the same color as the webpage.
Copy-paste the logo image with the background (e.g. logo-airbnb.png) into this slide. Click the image to select it > Right click > Size and Position > Check Lock aspect ratio > Change the longer side of the image to 0.96″.
Click the frame to select it > press Shift + click to select the logo image > Align Middle > Align Center.
Click the image to select it > Format > Recolor > Set Transparent Color > Click the brush icon on the logo image inside the frame. The original background color of the logo will now disappear.
Right click the frame > Format Picture > Line color > check No line.
Click the frame to select it > press Shift + click to select the logo image > Right click > Group.
Right click > Save as image, select the default PNG file format, save the file with a different name (e.g. logo-airbnb-2-150w-150h.png) from the preglazed image file.
This is how your working slide might look.
Frontpage:
Insert the above glazed image into the webpage and publish it to the website. You should see the following panel (Exhibit 4).

Voila! The background on the AirBnB logo has gone, mission accomplished!
To summarize, the successive effects of tiling and glazing are displayed in Exhibit 5 below.